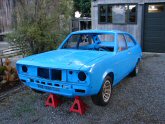
Right, I've decided to bite the bullet and I've got a long weekend booked off to sort out the gearbox. I've ordered a recon kit from Autogear so that should be with me in a few days. I thought I would just ask of peoples experiences in doing this? Are there any quick n easy ways to take the 'box off and what are peoples experiences like with the recon kits? Are they easy to fit or did you have a nightmare? Also what tools will I need to remove the gearbox, I have a fair bit of kit but I want to make sure I have everything before I start as I'd like to get this done (hopefully) in a couple of days.
Cheers
Bren
About to tackle the gearbox, anyone got any tips?
Moderators: ClaytonSpeed, balmy
-
Brenjacques
- Posts: 143
- Joined: Wed May 21, 2014 3:38 pm
-
First-Car as Marina

- Posts: 779
- Joined: Mon Jul 28, 2014 4:21 pm
Re: About to tackle the gearbox, anyone got any tips?
I haven't had any experience rebuilding the box however I have taken the box off and put it back on on my MK2 when doing the clutch. Some tips I would say are (depending if your car is set up similar to mine):
Take up the front carpet and then unscrew the gaiter and remove the gearstick as it made the box easier to take out.
Put a block of wood across the inner wings (under the clutch master and washer bottle and tie the engine to it as it will want to tip back, ruining your engine mounts.
It might be best to take the prop completely off to get it out the way but see how you go.
Take a look at your gearbox mount as it might have gone soft/snotty like mine did. They're on eBay and worth doing if they're going.
Don't think you'll need a clutch alignment tool as you're not touching the clutch but I'm sure someone will correct me if I'm not quite right.
When taking it out, slide it out about 8-10 inches before dropping it down to clear the input shaft.
We took it out and got it in by basically bench pressing it and using knees but someone may have a tip.
Either have the car up on the front or all of it in the air to make it easier for you.
Think the only tools you need are 2 1/2 spanners and 2 9/16 spanners.
I'd draw a picture of how the bell housing looks and as you take bolts out lay them on the drawing to where they came from.
Think that's about it but if I think of anything else I'll add it, best of luck and let us know how you get on
Alex
1976 1.3 DL Coupe - Retired daily after 2.5 years, smashed up, now being fixed (PDA 827R) (Lumpy)
1971 1.3 SDL Saloon - Rotting into the front garden, will resume in 2021 (VGV 616K) (Rusty)
1971 1.3 DL Coupe - MOT'ed and on the road, used as much as possible (REW 5K) (Tigger)
2013 Ford Focus Zetec S - Very economical and a great car in general
1971 1.3 SDL Saloon - Rotting into the front garden, will resume in 2021 (VGV 616K) (Rusty)
1971 1.3 DL Coupe - MOT'ed and on the road, used as much as possible (REW 5K) (Tigger)
2013 Ford Focus Zetec S - Very economical and a great car in general
-
MarinaCoupe

- Posts: 10194
- Joined: Thu May 31, 2007 5:26 pm
- Location: Bedford
- Contact:
Re: About to tackle the gearbox, anyone got any tips?
The interior of the gearbox is very straight forward. When I did my last one, I very carefully laid it out on a bench as I disassembled it, it made reassembly much easier than if I had jumbled it all together. Use the BL workshop manual as it is the most detailed. I only needed one special tool, an outer circlip spreader as there is a thin spring wire circlip half way down the main shaft that retains some of gear wheels. Make sure you have a soft headed (copper or similar) hammer when you are freeing and replacing the bearings etc.
Re: About to tackle the gearbox, anyone got any tips?
Done removal and replacement and the boxes are IMO unreasonably heavy for what they are: it’s the bell housing that makes it heavy. Getting them back needed strength and assistance. I always replaced the clutch and thrust bearing whilst boxes were out- saved the struggle in the future. Also refurbed the slave cylinder to try and avoid an inconvenient failure. I do tend to over maintain cars- the marina with that sort of over maintence is a very reliable car! Al the best with it.
-
tathoarder

- FMM Supporter

- Posts: 574
- Joined: Wed Nov 03, 2010 8:53 pm
- Location: Stroud
Re: About to tackle the gearbox, anyone got any tips?
Mine needs doing pretty desperately, so very interested to hear how you get on.
Good luck!
Sent from my iPhone using Tapatalk
Good luck!
Sent from my iPhone using Tapatalk

Re: About to tackle the gearbox, anyone got any tips?
I always disconnect the exhaust down pipe, gives the engine a bit more room to tilt backwards.
Re: About to tackle the gearbox, anyone got any tips?
I never attempt to remove the gearbox under the car. It is very easy to damage the input shaft by accidentally putting too much weight on it because the top of the bellhousing fouls the steering rack unless everything is hanging at a dangerous angle.
My method is to drop the entire engine/gearbox as a single unit, then raise the body and slide the whole thing out from underneath.
In my opinion it takes no more time and at least when using an engine hoist the whole process is easily managable and safe.
When stripping the mainshaft assembly make sure you inspect the 3 springs and ball bearings inside the two synchroniser assemblies. Every gearbox I have ever stripped had broken springs which totally defeated the synchro mechanism. The symptoms are exactly the same as worn out synchro rings. The springs are available from Rimmer Bros and only cost peanuts. There are different springs for each assembly.
Being able to bolt the gearbox/bellhousing/engine all together before refitting also removes a great number of annoying issues. Also enables checking the takeup of the clutch operating lever.
I find the Haynes manual has a very easy to follow step by step stripping/reassembling procedure.
Only thing I made up was a shorter dummy shaft for the layshaft gear cluster which keeps all the needle rollers in place during stripping and reassembly.
Best luck.
-
Brenjacques
- Posts: 143
- Joined: Wed May 21, 2014 3:38 pm
Re: About to tackle the gearbox, anyone got any tips?
Thanks for all of the advice! For those asking I'll report how I get on with it, it needs doing pretty desperately on mine too, I'm just hoping that the box is actually a good candidate. Thanks for the advice for the kit Chris, is there any chance you or any other reader could photograph the relevant pages of the BL manual? I only have the Haynes one to hand. Alex, I'll take your advice re. the block of wood, that should be a great help and I've ordered a new mount for the 'box too as it will likely need it anyway. Does anyone know if I will need to remove the clutch? I will try to source an allignment tool if I do, I think I may have to in order to access the oil seals etc but I haven't a clue at the minute. With luck I will be starting it tomorrow so I shall report how things are going.
-
Brenjacques
- Posts: 143
- Joined: Wed May 21, 2014 3:38 pm
Re: About to tackle the gearbox, anyone got any tips?
Thanks for the advice Kilroy, as much as I would love to remove the lot, I doubt this will be possible, I've no hoist and I am limited to just having the car parked up on the pavement at the minute as I have no room on the drive. I will just have to go with dropping it underneath. I should have an extra pair of hands to help and I'm going to my uncles to raid his kit too, did you have to remove the clutch plate when refurbing the gearbox? I'm thinking whether it is worth replacing it anyway whilst it is off.
Cheers
Bren
Cheers
Bren
Re: About to tackle the gearbox, anyone got any tips?
With 2 of you it will be perfectly safe. I've done lots of 1.8s and 1.3s over the years with the front of the car on ramps and using a trolley jack to support lowering the box on my own. Never had a problem yet.
-
MarinaCoupe
- Posts: 10194
- Joined: Thu May 31, 2007 5:26 pm
- Location: Bedford
- Contact:
Re: About to tackle the gearbox, anyone got any tips?
Bren,
No need to remove the clutch, except to disconnect the clutch slave.
I’ve done mine on car ramps and axle stands.
No need to remove the clutch, except to disconnect the clutch slave.
I’ve done mine on car ramps and axle stands.
-
david painter
- Posts: 1706
- Joined: Sat Nov 24, 2012 3:52 pm
Re: About to tackle the gearbox, anyone got any tips?
Make sure you have fully understood why its coming to pieces. Is it just bearing noise? Does it crunch wen changing gear? Does it chatter in gears? Having accurate diagnosis important. This allows you to focus on the areas of the gearbox, that are giving trouble when stripping it. From point of view of taking it out. Gear Lever can be unclipped from below when box has been lowered. Make sure propshaft flange is marked for alignment and balance purposes. I put a piece of polythene under master cylinder cap and screw it back on, this stops fluid leaking. I always undo red pipe at master cylinder end and leave it attached to slave cylinder. I would also look at condition of clutch when box is out, very easy to change then if required. As for box itself only special tool required are a dummy layshaft same length as gear cluster, use this with white water pump grease, to hold needle roller bearings in place for re assembly. Pin punches and circlip pliers along with copper hammer is all special tools required. If you have access to a BL parts book the exploded diagrams can aid reassembly Good Luck .
Dave
Dave
-
Brenjacques
- Posts: 143
- Joined: Wed May 21, 2014 3:38 pm
Re: About to tackle the gearbox, anyone got any tips?
Hi all,
The box is finally off, I've stripped it, degreased it and repainted it too and it is looking pretty smart. Yesterday I fitted the layshaft along with its new needle rollers, I've fitted the new springs and ball bearings to the mainshaft gears and began fitting the mainshaft back into the box. It's at this point that I've now ran into a problem. Firstly with the kit comes a needle roller bearing that I thought was to replace No82 on the exploded diagram attached. The original is a completely different size in both internal and external diameter. Secondly the O ring No3 seems to be missing, now I am almost certain that this was not in the box in the first place as I have been very careful dismantling and putting each component in numbered bags. So with both of these in mind were there design differences between earlier boxes and later? I've also scourered the area where I dismantled it just to be sure but I'm certain the O ring was not fitted. I'm going to leave the rest until I know as I wouldn't want any failure to occur after the rebuild.
Cheers
Bren
- Attachments
-
-
MarinaCoupe
- Posts: 10194
- Joined: Thu May 31, 2007 5:26 pm
- Location: Bedford
- Contact:
Re: About to tackle the gearbox, anyone got any tips?
From memory of a conversation with Darren White (RIP), early Mk1 gearboxes had a smaller caged bearing (no.82), but the torque of the engines would wreck them, so later bearings were larger. They are common with Triumph versions of the gearbox, early Herald/Spitfire/Early Dolomite and later versions the 4 speed TR7.
You haven’t said whether the supplied caged bearing is too big or too small.
I guess that O ring or more likely a spacer (no. 3) wasn’t needed on the other version of the gearbox.
You haven’t said whether the supplied caged bearing is too big or too small.
I guess that O ring or more likely a spacer (no. 3) wasn’t needed on the other version of the gearbox.
-
MarinaCoupe
- Posts: 10194
- Joined: Thu May 31, 2007 5:26 pm
- Location: Bedford
- Contact:
Re: About to tackle the gearbox, anyone got any tips?
Right here you go,
Early cage bearing (small) 13H 6968
Later cage bearing (larger) 13H 9513
The spacer is DAM 739, it looks like it was only used with the early caged bearing.
Early cage bearing (small) 13H 6968
Later cage bearing (larger) 13H 9513
The spacer is DAM 739, it looks like it was only used with the early caged bearing.